Hitler has been dreaming about the day that Apple's tablet will be announced. That day has come and he is not pleased.
Showing posts with label mac. Show all posts
Showing posts with label mac. Show all posts
Friday, February 19, 2010
Wednesday, July 1, 2009
Wednesday, June 24, 2009
How to Jailbreak Your iPhone on OS 3.0
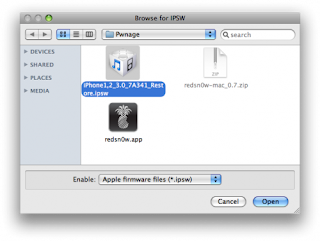
Using RedSn0w (Mac)
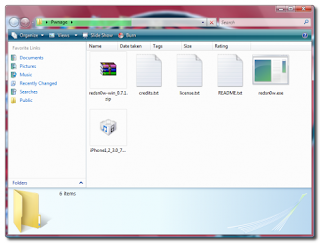
How to Jailbreak Your iPhone on OS 3.0 Using RedSn0w (Windows)
How to Jailbreak Your iPhone 3G on OS 3.0 Using PwnageTool (Mac)
Labels:
3.0,
iphone 3g,
iphonedomination,
jailbreak,
mac,
pwnage tool,
redsnow,
vista,
windows
Tuesday, June 9, 2009
The New iPhone 3gs
Apple Announces iPhone 3GS - 3 Megapixel Camera, Magnetometer, Video Recording, Voice Control and More
It looks just like your old iPhone, only it’s more awesome. WWDC’s biggest announcement has been made, and it’s for the next generation iPhone, dubbed the iPhone 3GS. (Hint: the S stands for sexy.. or maybe just speed).
Apple (NSDQ: AAPL)’s announcement today of the iPhone 3GS effectively relegates the iconic iPhone 3G (8GB) to lower-tier status as a $99 entry-level iPhone. What makes the new iPhone 3GS the new hotness worthy of replacing the iPhone 3G?
Let us count the ways:
* The iPhone 3GS boasts an upgraded 3.0-megapixel camera with autofocus (tap-to-focus)
* We’re finally able to record true-blue video at 30 FPS - videos can be editing on the iPhone 3GS, with support for one-touch video uploading to YouTube
* The new iPhone 3GS features Voice control - control playlists and make phone calls with your voice
* A digital compass allows for more accurate position data and turn-by-turn GPS
* Much faster processor and 256MB RAM allows for at least 2x times speed increases when running native iPhone apps
* iPhone 3GS comes pre-loaded with OS 3.0 goodies like cut and paste, universal search, stocks, and voice memos
* MMS via AT&T (NYSE: T) later this summer
* Tethering via everybody else but AT&T
* Nike+ integration
* Battery life improved: 9 hours of WiFi use, 10 hours of video watching, 30 hours of audio listening, 12 hours of 2G talk time
You can get the full spec rundown over here. To ditch antiquated stock mark the new iPhone dawn, Apple has slashed the price of the iPhone 3G to $99 and $149.
The iPhone 3GS, however, will be available June 19th for $299 for the 32GB model, and $199 for 16GB model, both available on preorder from AT&T starting tonight. Canada, France, Germany, UK, Spain, Italy, and Switzerland should also have the iPhone 3GS available for June 19th. All in all, it looks like a solid incremental upgrade for the iPhone, if nothing mind-blowingly new.
Those who are still rocking the original iPhone will be feeling the squeeze to upgrade to the 3GS, but even then, the operating system upgrade to version 3.0 will probably be enough to sate most users. What do you guys think of the new iPhone? Is a smoother experience and a new camera worth the money? Does video recording, turn-by-turn GPS navigation and improved battery life make the iPhone 3GS worthy of the $199 price-tag?
Saturday, June 6, 2009
Brain Boost Multiply - iPhone App Store

Brain Boost Multiply is an educational game to help improve your math skills(multiplication tables). You go through the levels(from 1-12). So level 1 teaches gives you random questions that include 0s and 1s. . .level 2 gives you questions that include 0s, 1s, and 2s. . .etc.
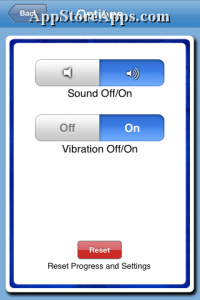
The application tracks which questions you get right/wrong and how long it took you to answer it. If you just want to practice a particular # you can do that by picking the level you want to play.
Thursday, June 4, 2009
Best iPhone Game - SpaceX
SpaceX begins with a spaceship taking on enemies in somewhat Galaga-style action. The ship is controlled with either your finger or by tilting the iPhone/iPod touch. The controls are quite responsive — the ship moves both from left to right and up and down on the screen so you can shoot enemies and snag upgrades that float across.
Wednesday, June 3, 2009
iPhone Games That Rocks - SpaceX
SpaceX begins with a spaceship taking on enemies in somewhat Galaga-style action. The ship is controlled with either your finger or by tilting the iPhone/iPod touch. The controls are quite responsive — the ship moves both from left to right and up and down on the screen so you can shoot enemies and snag upgrades that float across.
Labels:
2g,
3g,
apple,
apps,
iphone,
iphone domination,
ipodtouch,
mac,
spacex,
steve jobs
Emoji for my iPhone 3g
Love that emoticons in your ym, msn or skype?
Well, check this out.



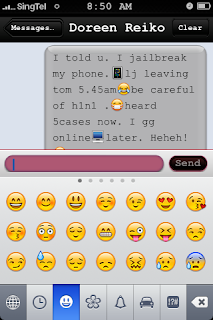
Now, I can do the same thing with my iphone 3g too..ladeeeeedaaaaaa!!!
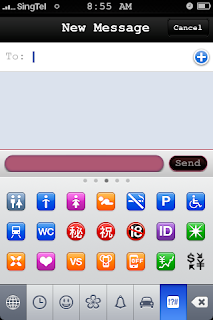
Emoji has made texting in my iphone 3g more fun and exciting!

With ssssooo many funny, unique and cool emos to choose from.
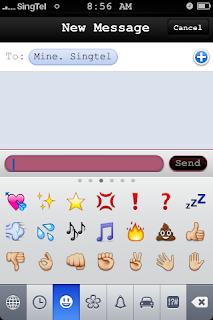
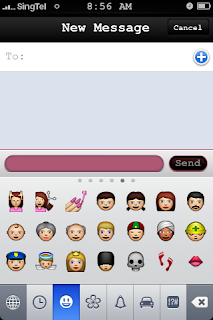
Watch out for my next thread on how to activate emoji in your iphone 3g.
For now, let me enjoy using it first. heheeh!
Well, check this out.


Now, I can do the same thing with my iphone 3g too..ladeeeeedaaaaaa!!!

Emoji has made texting in my iphone 3g more fun and exciting!

With ssssooo many funny, unique and cool emos to choose from.


Watch out for my next thread on how to activate emoji in your iphone 3g.
For now, let me enjoy using it first. heheeh!
Labels:
apple,
apps,
emoji,
emoticons,
iphone,
iphone domination,
mac,
mobile,
sms,
software,
texting
Monday, June 1, 2009
Top 5 iPhone 3G Tricks & Tips For Newbies
There are some pretty neat tricks and tips that some of the non-hardcore iPhone users might not know about, or have forgetten. I’m going to discuss them today. Ready? Let’s go!
Top 5 iPhone 3G Tricks & Tips for Newbies
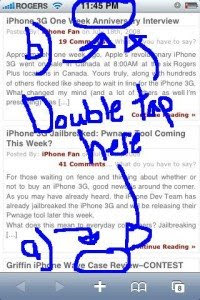
1. Safari tricks: return to home + page down.
a)In Safari, instead of scrolling down you can double tap quickly just above the “+” icon and this will bring you down a page.
b)To return to the top of the page, single tap the time at the top and you’ll jump back to the top of the page.
2. Google Maps: zoom in, zoom out.
Instead of pinching out to zoom out, if you tap the screen with two fingers, the page will zoom out. Voila!
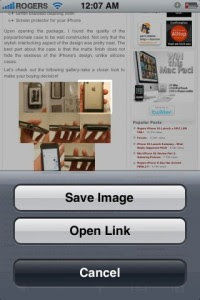
3. Save photos in Mail or Safari: You can save any photo emailed to you, or an image on a webpage. Just hold your finger down and the following prompt will appear (I think you can handle the next step):
4. One step slide for typing capital letters or numbers: Instead of pressing the “shift” or “.?123″ buttons and letting go to capitalize a letter or get a number, here’s a cool short cut. Tap the “shift”/”.?123″ button and hold your finger down, then slide to the appropriate letter or number and let go. BAM! You just saved yourself a key press! Try it out! This will increase your typing efficiency big time!
5. Surf Safari in landscape mode–in bed: A lot of people use their iPhones in bed (don’t lie, I do it too–so sad). Anyways, if you want to surf the web in Safari in landscape mode while lying on your side it can be a problem. The iPhone’s accelerometer will automatically rotate the browser whenever you turn the iPhone on its side.
To fix this problem, turn your iPhone into landscape mode–then rotate the iPhone so the Home button will be pointing towards your ceiling. This will hold Safari in landscape while you’re surfing the web in bed on your side–allowing you to keep Disconnect Anxiety at bay.
Bonus tip: Like to take self portraits with the camera? Here’s a handy tip: first hold your finger down on the shutter button and keep it there. Next, strike a pose while holding the camera at a distance–then release your finger–BAM…a photo will be taken! This method helps reduce the shake that usually occurs when you press the shutter, resulting in blurry images.
I know you might already know some of these tricks. However a lot of people don’t so this is why I’m posting them.
Source:
http://www.iphoneincanada.ca
Top 5 iPhone 3G Tricks & Tips for Newbies
1. Safari tricks: return to home + page down.
a)In Safari, instead of scrolling down you can double tap quickly just above the “+” icon and this will bring you down a page.
b)To return to the top of the page, single tap the time at the top and you’ll jump back to the top of the page.

2. Google Maps: zoom in, zoom out.
Instead of pinching out to zoom out, if you tap the screen with two fingers, the page will zoom out. Voila!
3. Save photos in Mail or Safari: You can save any photo emailed to you, or an image on a webpage. Just hold your finger down and the following prompt will appear (I think you can handle the next step):

4. One step slide for typing capital letters or numbers: Instead of pressing the “shift” or “.?123″ buttons and letting go to capitalize a letter or get a number, here’s a cool short cut. Tap the “shift”/”.?123″ button and hold your finger down, then slide to the appropriate letter or number and let go. BAM! You just saved yourself a key press! Try it out! This will increase your typing efficiency big time!
5. Surf Safari in landscape mode–in bed: A lot of people use their iPhones in bed (don’t lie, I do it too–so sad). Anyways, if you want to surf the web in Safari in landscape mode while lying on your side it can be a problem. The iPhone’s accelerometer will automatically rotate the browser whenever you turn the iPhone on its side.
To fix this problem, turn your iPhone into landscape mode–then rotate the iPhone so the Home button will be pointing towards your ceiling. This will hold Safari in landscape while you’re surfing the web in bed on your side–allowing you to keep Disconnect Anxiety at bay.
Bonus tip: Like to take self portraits with the camera? Here’s a handy tip: first hold your finger down on the shutter button and keep it there. Next, strike a pose while holding the camera at a distance–then release your finger–BAM…a photo will be taken! This method helps reduce the shake that usually occurs when you press the shutter, resulting in blurry images.
I know you might already know some of these tricks. However a lot of people don’t so this is why I’m posting them.
Source:
http://www.iphoneincanada.ca
Labels:
2g,
3g,
apple,
email,
google maps,
image,
iphone,
iphone domination,
keys,
mac,
mobile,
newbies,
phone,
shortcuts,
tips,
tricks
How To Jailbreak Your iPhone using Pwnage Tool
Jailbreaking your iphone is fun and exciting!
Source:
www.iClarified.com
This tutorial will show you how to jailbreak your 3G iPhone. It has been updated for the 2.2.1 firmware.
To learn how to use PwnageTool to unlock/jailbreak a 2G iPhone you can use the tutorial found: here.
If you have a 3G iPhone make sure you have iTunes 8.0.2 and continue.
Step One
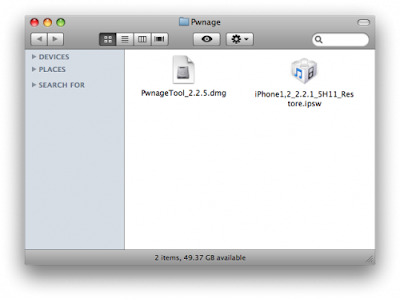
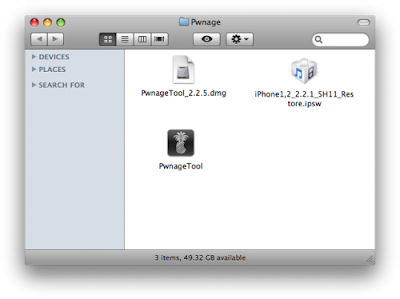
Make a folder called "Pwnage" on the desktop. In it, you will need a couple of things. PwnageTool 2.2.5, found here or here
You will also need the 2.2.1 iPhone firmware.
2.2.1 (3G): iPhone1,2_2.2.1_5H11_Restore.ipsw
When downloading the IPSW file, it is best to download it with Firefox!
Step Two
Double click to mount PwnageTool 2.2.5 then drag the PwnageTool icon into the Pwnage folder.
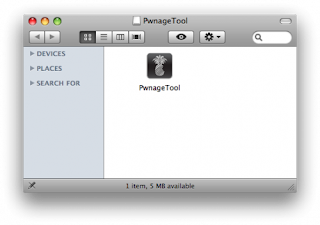
Then from the Pwnage folder double click to launch the PwnageTool application.
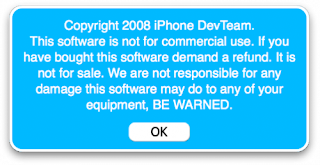
Click Ok if presented with a warning.
Step Three
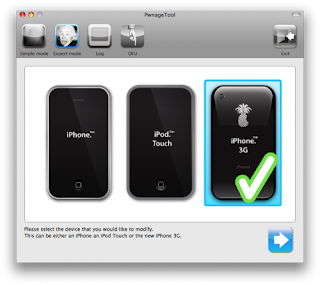
Click to select Expert Mode from the top menu bar.

Step Four
Click to select your iPhone. A check-mark will appear over the image of the phone.
Step Five
Click the blue arrow button to continue. You will be brought to the "Browse for IPSW" page. On my laptop, it automatically found the IPSW. If PwnageTool doesn't automatically find the ipsw file you can click Browse for IPSW....
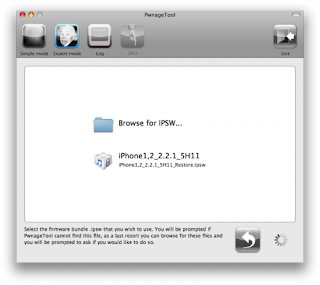
Click to select the found IPSW file, a checkmark will appear next to it. Then click the blue arrow button to continue.

Step Six
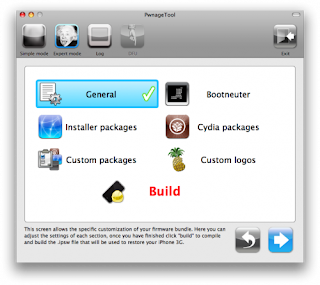
You will then be brought to a menu with 7 choices. Click to select General then click the blue arrow button.
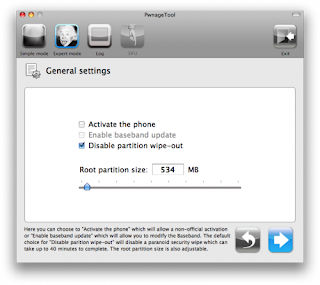
The General settings allows you to decide the partition size. Click activate the phone and Disable partition wipe-out. Click the blue arrow button.
NOTE*: Deselect Activate if you have an iPhone legitimately activated on an official carrier.
NOTE*: You may need to increase the size of the root partition slightly. My first attempt failed at creating the IPSW until I increased the size to about 695 MB.
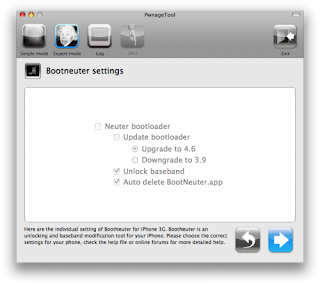
The Bootneuter settings are greyed out for the 3G iPhone. Click the blue arrow button.
The Cydia settings menu allows you to create custom packages so you do not have to manually install the necessary them later.
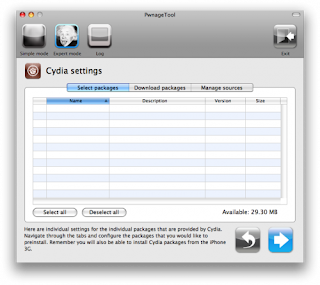
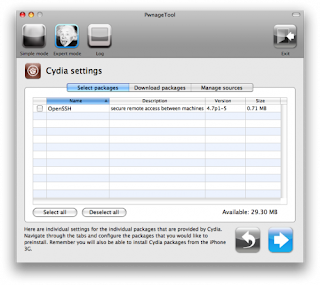
Click to select the Download packages tab. Then click the Refresh button to display all the available packages. Double clicking the package you want will download it and make it available in the Select Packages tab.
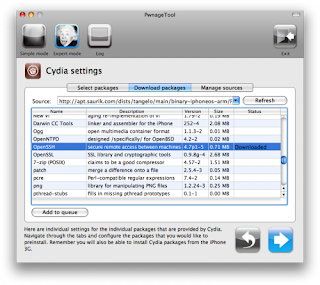
Checkmark the ones you want then Click the blue arrow button.
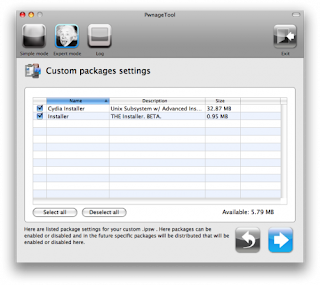
The Custom Packages Settings menu displays listed package settings for your custom IPSW. For know leave these settings as is. Click the blue arrow button to continue.
The Custom Logos Settings menu allows you to add your own images as boot logos. Click the Browse button to select your Boot logo and Recovery logo. If you would like to use the iClarified ones they can be found here: Boot Logo, Recovery Logo.
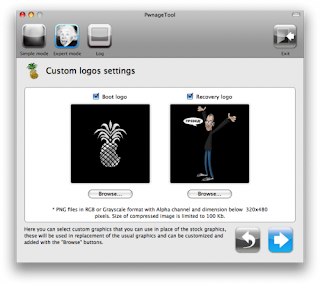
Remember the rules for them: RGB or Grayscale format with Alpha channel and dimension bellow 320x480...
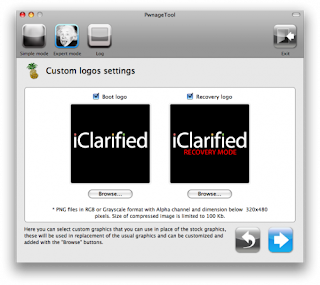
Click the blue arrow button to continue.
Step Seven
You are now ready to begin the pwnage process! Click the Build button to select it then click the Blue arrow button to begin.
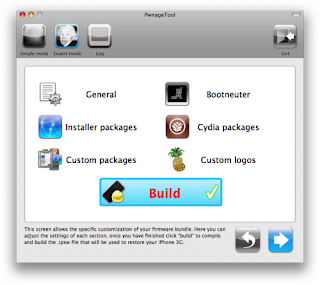
Step Eight
You will be asked to save your custom .ipsw file. Save it to your Pwnage folder you created on your Desktop.
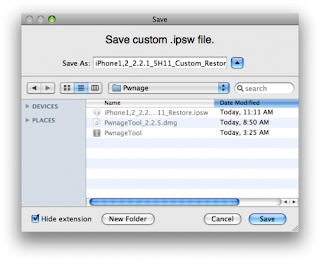
Your IPSW is not being built. Please allow up to 10 minutes.
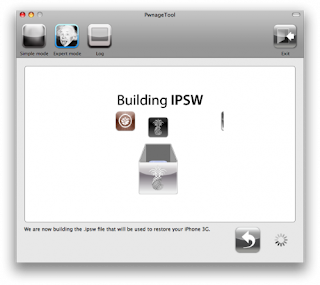
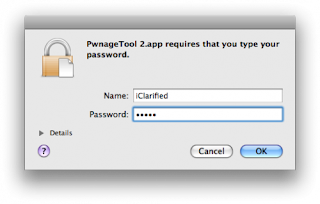
ou will be asked to enter your administrator password. Do this then click the OK button.
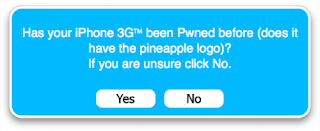
When prompted if your iPhone has been Pwned before, we clicked No. It allows for a more thorough restore.
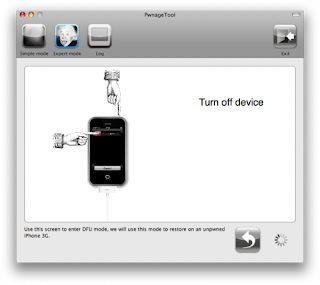
You will be asked to turn off the device. Make sure it is connected to the USB port.
Step Nine
Be ready to follow directions now. It will ask you to hold the home button and the power button for 10 seconds. Then, you will have to release the power button and hold the home button for 10 seconds to enter DFU.
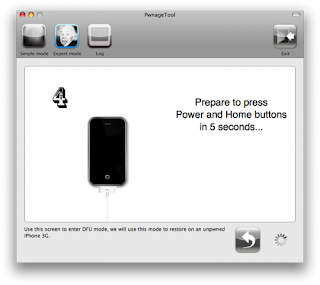
If you fail, it will show you a message. Click Yes. Unplug the iPhone from the USB. Turn it off, then turn it back on. Plug it back into the USB and turn off the iPhone when prompted.
When done correctly, Pwnage 2.2 will display a message telling your that it successfully entered DFU mode. iTunes will also pop-up.
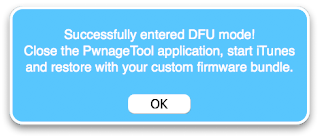
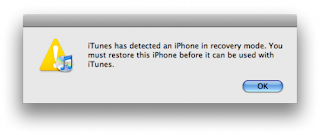
IMPORTANT***: If you have Mac OS X 10.5.6 you may have an issue with putting your iPhone into DFU mode. The easiest option is to use a USB hub between your iPhone and the computer. Another option is to run this automator script. NOTE*: Make sure the script completes properly. If the files are not replaced properly you will lose keyboard and mouse upon reboot. Later today we will post a third alternative for enabling DFU mode on your Mac.
Step Ten
In iTunes, hold the Alt/Option button and click Restore.
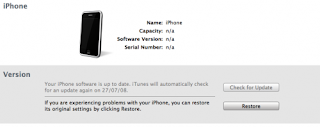
Step Eleven
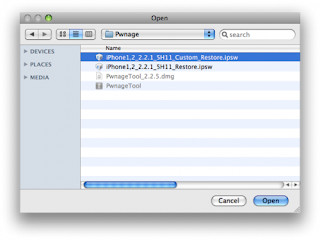
Navigate to the Pwnage folder on your desktop using the dialog window that appears. Select the custom IPSW that was created (iPhone1,2_2.2.1_5H11_Custom_Restore.ipsw) and click the Open button.
Step Twelve
iTunes will now restore the firmware on your iPhone. This can also take up to 10 minutes.
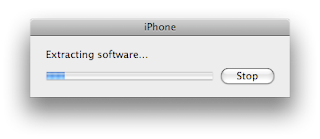
If you so desire you may restore from a previous backup to keep all your settings or set your iPhone up fresh.
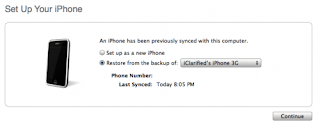
Step Thirteen
Once the restore is completed your iPhone will reboot and you will notice Cydia is present on the SpringBoard!
Source:
www.iClarified.com
This tutorial will show you how to jailbreak your 3G iPhone. It has been updated for the 2.2.1 firmware.
To learn how to use PwnageTool to unlock/jailbreak a 2G iPhone you can use the tutorial found: here.
If you have a 3G iPhone make sure you have iTunes 8.0.2 and continue.
Step One
Make a folder called "Pwnage" on the desktop. In it, you will need a couple of things. PwnageTool 2.2.5, found here or here
You will also need the 2.2.1 iPhone firmware.
2.2.1 (3G): iPhone1,2_2.2.1_5H11_Restore.ipsw
When downloading the IPSW file, it is best to download it with Firefox!

Step Two
Double click to mount PwnageTool 2.2.5 then drag the PwnageTool icon into the Pwnage folder.

Then from the Pwnage folder double click to launch the PwnageTool application.

Click Ok if presented with a warning.

Step Three
Click to select Expert Mode from the top menu bar.

Step Four
Click to select your iPhone. A check-mark will appear over the image of the phone.

Step Five
Click the blue arrow button to continue. You will be brought to the "Browse for IPSW" page. On my laptop, it automatically found the IPSW. If PwnageTool doesn't automatically find the ipsw file you can click Browse for IPSW....

Click to select the found IPSW file, a checkmark will appear next to it. Then click the blue arrow button to continue.

Step Six
You will then be brought to a menu with 7 choices. Click to select General then click the blue arrow button.

The General settings allows you to decide the partition size. Click activate the phone and Disable partition wipe-out. Click the blue arrow button.
NOTE*: Deselect Activate if you have an iPhone legitimately activated on an official carrier.
NOTE*: You may need to increase the size of the root partition slightly. My first attempt failed at creating the IPSW until I increased the size to about 695 MB.

The Bootneuter settings are greyed out for the 3G iPhone. Click the blue arrow button.

The Cydia settings menu allows you to create custom packages so you do not have to manually install the necessary them later.

Click to select the Download packages tab. Then click the Refresh button to display all the available packages. Double clicking the package you want will download it and make it available in the Select Packages tab.

Checkmark the ones you want then Click the blue arrow button.

The Custom Packages Settings menu displays listed package settings for your custom IPSW. For know leave these settings as is. Click the blue arrow button to continue.

The Custom Logos Settings menu allows you to add your own images as boot logos. Click the Browse button to select your Boot logo and Recovery logo. If you would like to use the iClarified ones they can be found here: Boot Logo, Recovery Logo.

Remember the rules for them: RGB or Grayscale format with Alpha channel and dimension bellow 320x480...

Click the blue arrow button to continue.
Step Seven
You are now ready to begin the pwnage process! Click the Build button to select it then click the Blue arrow button to begin.

Step Eight
You will be asked to save your custom .ipsw file. Save it to your Pwnage folder you created on your Desktop.

Your IPSW is not being built. Please allow up to 10 minutes.

ou will be asked to enter your administrator password. Do this then click the OK button.

When prompted if your iPhone has been Pwned before, we clicked No. It allows for a more thorough restore.

You will be asked to turn off the device. Make sure it is connected to the USB port.

Step Nine
Be ready to follow directions now. It will ask you to hold the home button and the power button for 10 seconds. Then, you will have to release the power button and hold the home button for 10 seconds to enter DFU.

If you fail, it will show you a message. Click Yes. Unplug the iPhone from the USB. Turn it off, then turn it back on. Plug it back into the USB and turn off the iPhone when prompted.
When done correctly, Pwnage 2.2 will display a message telling your that it successfully entered DFU mode. iTunes will also pop-up.


IMPORTANT***: If you have Mac OS X 10.5.6 you may have an issue with putting your iPhone into DFU mode. The easiest option is to use a USB hub between your iPhone and the computer. Another option is to run this automator script. NOTE*: Make sure the script completes properly. If the files are not replaced properly you will lose keyboard and mouse upon reboot. Later today we will post a third alternative for enabling DFU mode on your Mac.
Step Ten
In iTunes, hold the Alt/Option button and click Restore.

Step Eleven
Navigate to the Pwnage folder on your desktop using the dialog window that appears. Select the custom IPSW that was created (iPhone1,2_2.2.1_5H11_Custom_Restore.ipsw) and click the Open button.

Step Twelve
iTunes will now restore the firmware on your iPhone. This can also take up to 10 minutes.

If you so desire you may restore from a previous backup to keep all your settings or set your iPhone up fresh.

Step Thirteen
Once the restore is completed your iPhone will reboot and you will notice Cydia is present on the SpringBoard!
Sunday, May 31, 2009
My Fave Iphone Game - Bejeweled 2
Bejeweled virgins, the object of the game is to switch adjacent gems, either horizontally or vertically, in order to line up three or more of the same types to earn points. When this happens, the gems vanish, allowing new gems to fall from above. This can result in cascades, in which gems align by where they fall and more points are earned, the points for each level being represented by a growing bar. A level is won by completing increasingly more sets of gems and lost when "NO MORE MOVES" appears. There's more to it than that, of course.
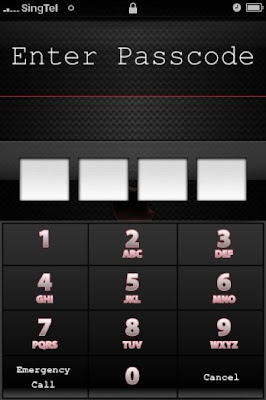
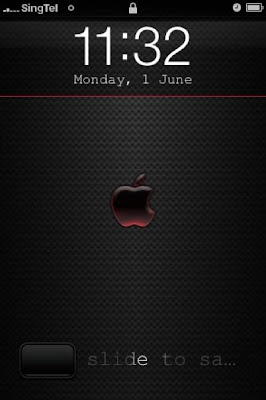
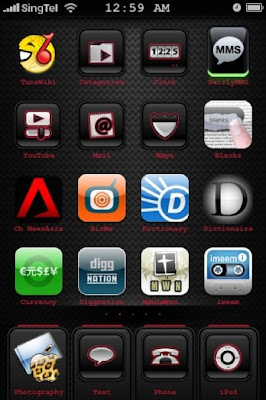
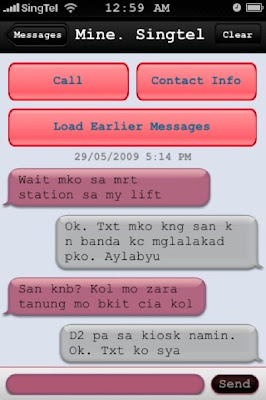
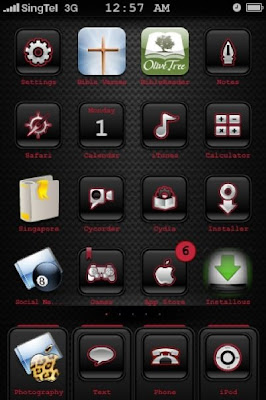
My New iPhone Theme - Apple Edge Icons
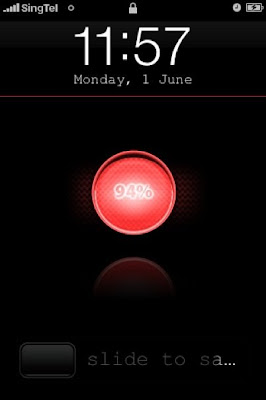
Posting my new iPhone springboard theme of the day.
I'm loving it.
Thank God for Cydia!
Now I can change the look of my iphone anytime!
Labels:
3g,
apple,
iphone,
iphone domination,
mac,
mobile,
sms,
springboard,
themes,
winterboard
Subscribe to:
Comments (Atom)